Once you are happy with the design, content and layout of your e-mail and have sent a preview you are probably ready to send it. It is important to double-check every aspect of the mail shot before sending as the send process cannot be stopped once started. To begin the sending process, open your mail shot and click the Send tab. This will navigate you to a page where you can choose various settings and ultimately send the mail shot.
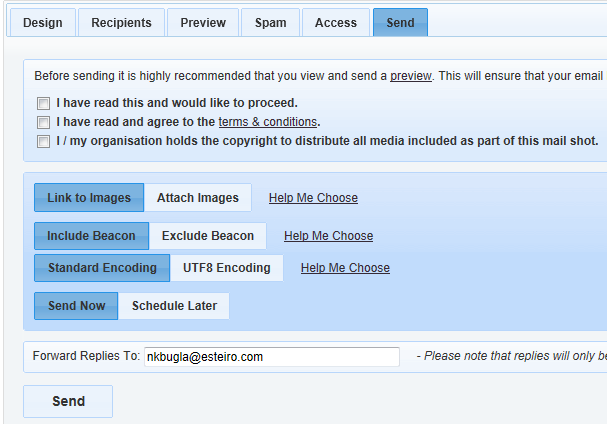
Under the Send tab there are several options, these are outlined below
When you are happy with your options continue with the sending process, please see the Sending the Mail Shot section below.
To continue the sending process, click the Send button at the bottom. This will prompt you to confirm before finally processing the send request.
Please note - only the owner of the Mailshot or a Gold-Vision Connect Administrator can send a Mailshot.
Confirmation Checkboxes - There are three confirmation checkboxes on the final send screen. These must all be checked to be able to send the mailshot. Please only check the options if you agree with statements next to them.
Once the mailshot has been "sent", you will gain access to the Tracking and Reporting tabs. These will allow you to track the progress and responses to your mailshot. Please note that if you chose to "schedule" the mail shot you must wait until it has sent before gaining access to the reporting tabs.
Please Note: It may take several minutes or longer to process all recipients of your mail shot. One of the reasons for this is that some mail servers require a long wait time between initially trying to receive the email and it actually being delivered. The number of recipients in your mail shot will also affect the delivery speed.